In this article, you will see how to use Cloudflare WARP with AmneziaVPN using wgcf.
1. First, download the latest release of wgcf. This will help you generate a WARP profile.
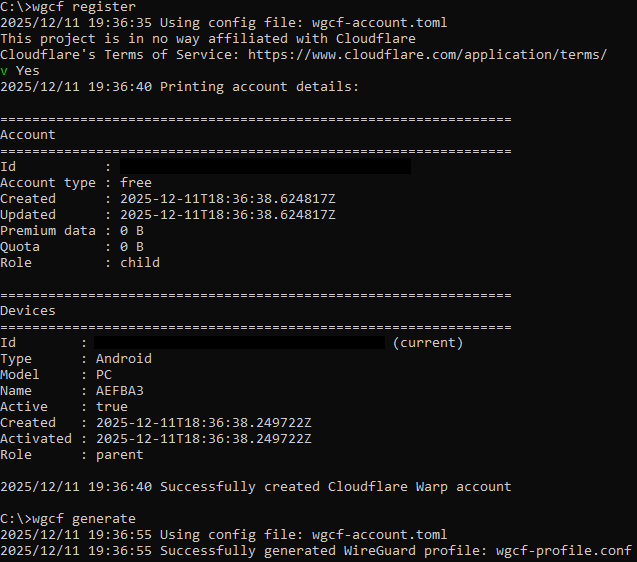
2. Open your terminal, and generate a WARP profile with the following commands:
wgcf registerwgcf generate
This will create two files in the folder where you executed your wgcf commands:
wgcf-account.toml and
wgcf-profile.conf.
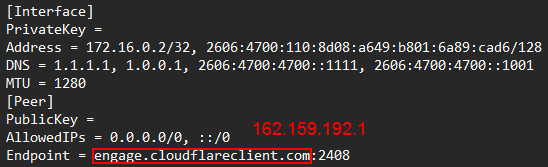
3. Open the wgcf-profile.conf file with a text editor, and replace
engage.cloudflareclient.com on line 9 with
162.159.192.1.
Note: this address may change in the future, but so far, it hasn't.
4. Save the file, and import it into AmneziaVPN.
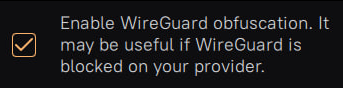
Optional: If you need to obfuscate your Wireguard VPN traffic in case your provider blocks it, make sure to tick the "Enable Wireguard obfuscation" option. Do note, however, that this may not always work.